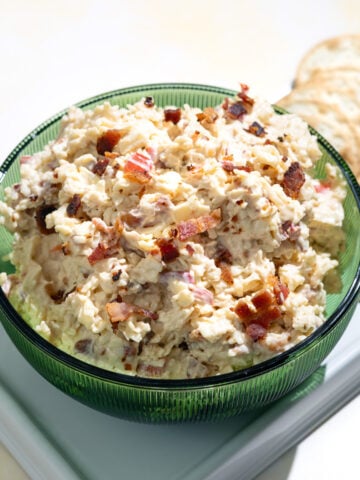
Cheese coins are the perfect small, crispy bite to serve at any holiday party, tailgate, or on any cheeseboard. Made with butter, cheddar cheese, rice krispies cereal, and spices - then baked to perfection. They have the perfect crunch thanks to Rice Krispies cereal and are bursting with flavor.

Growing up in the South, there are some recipes just feel like they've always been around. Rice Krispie cheese crackers are one of those Southern staples I've spotted at brunches, showers, and tailgates my entire life. They are crunchy, cheesy, and downright addictive!
A couple of Christmases ago, I found a version in my Southern Living Christmas cookbook, made them for the holidays, and they were an instant hit. I served them on a big charcuterie board spread with some red pepper jelly, and we couldn't stop eating them. Just like sausage balls, you literally can't have just one.
Since then, I've put my own twist on the recipe, spicing it up a little, and they've stayed a crowd favorite. Serve them on their own or with a spread for that cheesy-salty-sweet-spicy magic that keeps everyone coming back for more.


Different Ways to Prepare
I tested and tried 2 different ways to bake and prepare. Both are easy and great - it is just a total preference on your part which one you do.
Ball Shape
- Scoop out the cheese dough with a cookie scoop and place it on a baking sheet lined with parchment paper.
- Gently roll each ball in your hands making sure the dough is tight together.
- Press down the tops with a fork in a crisscross pattern.


Slice and Bake Coins
- Place the dough on a piece of parchment paper and roughly shape it into a log.
- Roll the dough tightly into the paper in a log form bringing the dough tightly together. Roll the ends of the paper together and place in the fridge to chill for at least an hour.
- After chilled, remove and slice into ¼" thick slices (like slice-and-bake cookies) and place on a baking sheet lined with parchment paper.


Both are great options and work great - I switch out each time I make them. If you are making ahead of time, the slice and bake method is a super easy way to have them on hand ready to go when you are ready to bake off and serve!


Recipe

Crunchy Baked Rice Krispie Cheese Coins
- Total Time: 35 minutes
- Yield: 28 balls/30 coins 1x
Description
Cheese coins are the perfect small crispy bite to serve at any holiday party, tailgate, or on any cheeseboard. Made with butter, cheddar cheese, rice krispie cereal, and spices - then baked to perfection. They have the perfect crunch thanks to rice krispie cereal and bursting with flavor.
Ingredients
- ½ Cup Butter - room temperature
- 1 Cup Cheddar Cheese - buy the block and shred yourself
- ½ Teaspoon Hot Sauce
- ½ Teaspoon Worcestershire Sauce
- ½ Teaspoon Salt
- ½ Teaspoon Garlic Powder
- ¼ Teaspoon Cayenne Pepper
- ¼ Teaspoon Smoked Paprika
- ¼ Teaspoon Dry Mustard
- ¼ Teaspoon White Pepper
- 1 Cup Flour
- 1 Cup Rice Krispie Cereal
Instructions
- Preheat oven. Preheat oven to 350 degrees.
- Make cheese mixture. In a food processor, add the butter, cheddar cheese, hot sauce, Worcestershire sauce, and all the spices. Pulse several times until starting to come together then turn on and let blend until a thick cheese mixture and everything is smooth and blended together.
- Add flour. Add in flour and pulse until combined and slightly crumbly.
- Add rice krispie cereal. Transfer dough to a large bowl and add in rice krispie cereal. Mix with a spatula or by hand until the cereal is combined throughout the cheese mixture.
- Roll out and bake. You have 2 options to bake. ONE: scoop out the cheese dough with a cookie scoop and place it on a baking sheet lined with parchment paper. Gently roll each ball in your hands making sure the dough is tight together. Press down the tops with a fork in a crisscross pattern. TWO: place the dough on a piece of parchment paper and roughly shape it into a log. Roll the dough tightly into the paper in a log form bringing the dough tightly together. Roll the ends of the paper together and place in the fridge to chill for at least an hour. After chilled, remove and slice into ¼" thick slices (like slice-and-bake cookies) and place on a baking sheet lined with parchment paper.
- Bake. Place in the oven and bake for 12-15 minutes
- Serve. Remove and serve warm or at room temperature on a platter or a charcuterie board.
Notes
- Keep covered airtight in the fridge for 4-5 days.
To Make Ahead and Freeze
- To Make Ahead: the slice and bake method is easiest if you are wanting to make it 1-2 days before baking and serving. Keep the dough rolled tightly in the parchment paper log/roll and keep stored in the fridge. Remove, slice, and bake when ready to serve.
- To Freeze: Make the recipe according to the directions. Cool completely. Once cooled, place in a freezer-safe ziptop bag (making sure to remove all the air), and store in the freezer for 6 months. Remove from the freezer and place in the fridge for 24 hours to thaw - serve chilled or at room temp.
- Prep Time: 20 minutes
- Cook Time: 15 minutes
- Category: Appetizer
- Method: Baking
- Cuisine: American
Nutrition
- Serving Size: 1 coin
- Calories: 74
- Sugar: 0.1 g
- Sodium: 75.6 mg
- Fat: 4.9 g
- Carbohydrates: 5.6 g
- Fiber: 0.1 g
- Protein: 1.8 g
- Cholesterol: 13.4 mg
DISCLOSURE. SOME OF THE LINKS BELOW ARE AFFILIATE LINKS, WHICH MEANS THAT IF YOU CLICK ON A PRODUCT LINK, I MAY RECEIVE COMPENSATION. THIS COMPENSATION COMES AT NO ADDITIONAL COST TO YOU, AND AS ALWAYS I ONLY RECOMMEND PRODUCTS I TRUST! HEATHER BILYEU IS A PARTICIPANT IN THE AMAZON SERVICES LLC ASSOCIATES PROGRAM, AN AFFILIATE ADVERTISING PROGRAM DESIGNED TO PROVIDE A MEANS FOR SITES TO EARN ADVERTISING FEES BY ADVERTISING AND LINKING TO AMAZON.COM.