Craft your own creamy homemade butter recipe with just two simple ingredients and the magic of a stand mixer. Heavy cream and salt come together, transforming it into a velvety spread to use in your favorite recipes in just 15 minutes or less!

Raise your hand if you love butter!! 🙋♀️If you don't raise your hand you're lying! We all love it!
Butter is a versatile dairy product derived from churning cream or milk. Its rich texture and distinct flavor make it a fundamental element in so many different foods. And this southern cook uses it nearly every day! It adds smoothness, enhances flavors, and aids in processes like baking and cooking, making it a crucial component for both sweet and savory dishes.
Plus is there anything better than a piece of sourdough bread or a warm fluffy biscuit with butter all over it?! The answer is no!
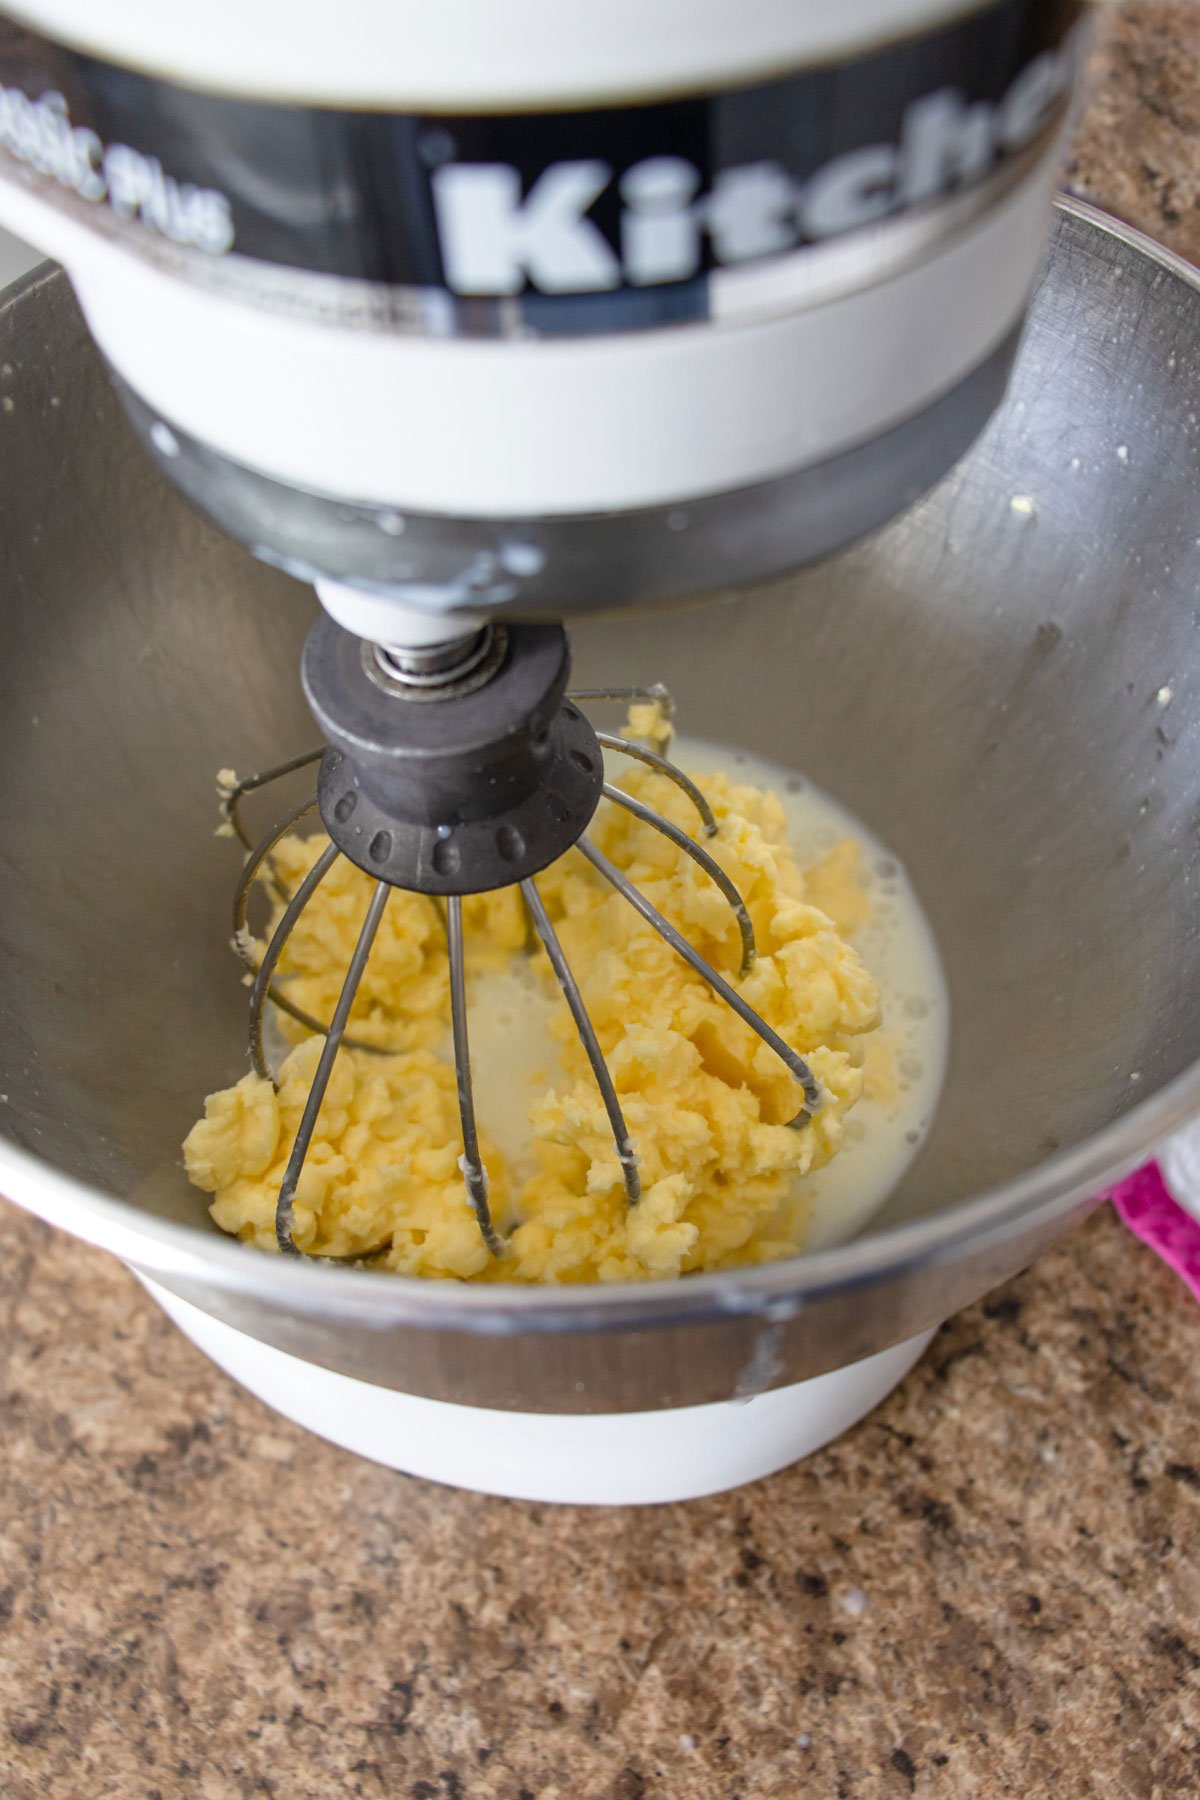
While traditional butter consists of just two simple ingredients—cream and sometimes salt—modern butter products often incorporate chemicals, fillers, and preservatives. Making your own homemade butter ensures pure butter, free from additives, with an excellent fresh taste! And it couldn’t be easier to make! Simply add heavy cream to a stand mixer and whisk on high until the cream separates into buttermilk and delicious butter made from scratch.
Butter is essential in cooking due to its versatility, whether it's enriching baked goods, creating sauces, or enhancing the searing process in frying. It can be spread on bread, melted over vegetables, or used as a base for pastries. I love using homemade butter on a batch of oven baked cast iron skillet biscuits or comforting brown butter apple bars. No matter how you use it, I’m confident you’ll never go back to store-bought with this easy two-ingredient recipe.

How to Make at home


PRO TIP: From the multiple recipe tests I did when making butter, it was about 10 recipe tests in that I realized running the butter under cold water before adding the salt or other mix-ins really helped! It doesn't require anything complicated, just after you have strained the butter and squeezed out the excess buttermilk, run the butter ball under cold water real quickly to help get off any remaining buttermilk moisture. Lightly pat dry with a paper towel before adding in salt and other flavors.


The leftover liquid from making butter is buttermilk. Use it in making recipes like herbed garlic cream cheese spread with buttermilk or leftover mashed potato buttermilk biscuits or fluffy sweet potato buttermilk waffles or 3 ingredient buttermilk drop biscuits - it's so versitle, and can be used for anything where buttermilk is called for. Keep in the fridge covered tightly for 2 weeks.
Storing & Freezing
Storing: To keep your homemade butter fresh, store it in an airtight container in the refrigerator. This will maintain its flavor and texture for up to two weeks. Remember that homemade butter might have a slightly shorter shelf life compared to commercially produced butter due to the absence of preservatives.
Freezing: Wrap the butter tightly in plastic wrap or parchment paper, then place it in an airtight container or freezer bag. It can be stored in the freezer for up to six months. When you're ready to use it, thaw the butter in the refrigerator for 24 hours to preserve its quality. Keep in mind that freezing may slightly alter the texture of the butter, so it's best used in cooking or baking rather than for spreading.

Recipe

Creamy Homemade Butter Recipe
- Total Time: 15 minutes
- Yield: ½ cup
- Diet: Gluten Free
Description
Craft your own Creamy Homemade Butter Recipe with just two simple ingredients and the magic of a stand mixer. Heavy cream and salt come together, transforming it into a velvety spread to use in your favorite recipes in just 15 minutes or less!
Ingredients
- 1 Pint (16 ounces) of Heavy Whipping Cream
- ½ Teaspoon Salt
Instructions
- To a stand mixer, add in the cold heavy whipping cream and beat on high with the whisk attachment for 5-7 minutes. Place a tea towel over the top of the mixer and bowl to prevent the cream from splattering over your counters.
- Over 5-7 minutes, the cream will go from a whipping cream consistency to separating and curdling.
- The cream will have separated into the butter and buttermilk when finished. Turn off the mixer and gently remove the whisk attachment (most of the butter will be on the whisk).
- Place a large fine mesh strainer over a big bowl. Remove the butter from the whisk into the strainer, then pour off the buttermilk from the bowl into the strainer.
- With your hands, squeeze any remaining liquid out from the butter into the strainer. Quickly run the ball of butter under cold water and lightly pat dry with a paper towel.
- Place the butter in a bowl and sprinkle the salt on top. With a spatula, mix and incorporate the salt throughout the butter.
- From here you can either store it in a mason jar or place it on a sheet of parchment paper, spread it out into a log shape, and roll the end tightly to seal. Store in the fridge to chill until needed.
Notes
Storing: To keep your homemade butter fresh, store it in an airtight container in the refrigerator. This will maintain its flavor and texture for up to two weeks.
Freezing: Wrap the butter tightly in plastic wrap or parchment paper, then place it in an airtight container or freezer bag. It can be stored in the freezer for up to six months. When you're ready to use it, thaw the butter in the refrigerator for 24 hours to preserve its quality.
- Prep Time: 15 minutes
- Cook Time: 0 minutes
- Category: Dips and Spreads
- Method: Baking
- Cuisine: American
Nutrition
- Serving Size: 1 tablespoon
- Calories: 102
- Sugar: 0.9 g
- Sodium: 153.4 mg
- Fat: 10.8 g
- Carbohydrates: 0.8 g
- Fiber: 0 g
- Protein: 0.9 g
- Cholesterol: 33.9 mg


